Take It Apart; Put It
Together!

There was a time when everything was made by hand, but the American
Industrial Revolution of the late 18th Century resulted in the introduction of
machinery and a major change in the way products are manufactured in this
country. Today we've become so used to mass-produced goods that we give little
thought to how they're made.
In this activity, we'll take things apart and study how they're
constructed. Then we'll use the items as templates to recycle waste materials
into new products such as envelopes, pocket folders, and gift bags. Recycling
materials in this way helps save natural resources, the energy needed to
produce new goods, and landfill space.
You Will Need:

- Magazine pages
- Decorative sacks
- Scraps of gift wrap
- Wallpaper sample book
- Color newspaper comics
- Scrap, lightweight cardboard
- Colored pencils or markers
- Pocket folder, envelope, and small gift bag
- Utility knife and scissors
- T-square or triangle
- White glue
- Glue stick
- Pencil
- Ruler
How to:
Take it Apart
Have an adult use a utility knife to cut the pages from a wallpaper
sample book. Collect other interesting papers such as scraps of gift wrap,
decorative sacks, and the color comics from your Sunday newspaper.
Study the pocket folder, envelope, and gift bag to see how they're
folded and where they're glued or fastened. Carefully pull them apart, and
flatten the paper or cardboard. Now use the shapes as patterns to make more of
the items.
Put it Together
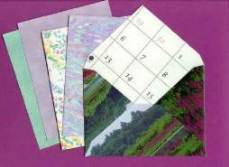
Create an Envelope:

- Lay the envelope pattern on the back side of a magazine or comic
page, gift wrap, decorative sack, or a piece of wallpaper.
- Trace the shape, and cut it out.
- Notice where the manufacturer scored or folded the original
envelope. Fold along the same lines on the new envelope, and glue the flaps
together.
- If the envelope is very dark or highly decorated, address it using
an adhesive label. Seal it with a glue stick before mailing.
Make a Pocket Folder:

- Lay the pocket folder pattern on a large scrap of lightweight
poster board. Trace the shape, and cut it out.
- Decorate the outside with colored pencils or markers. If you wish
to cover the folder with decorative paper, cut a rectangle from a scrap of gift
wrap or other material. Allow about .50" margin all the way around to finish
the edge.
- Apply glue stick to the new folder, and center it on the wrong
side of the paper. Smooth it out, starting at the center and working toward the
edges.
- Miter the corners by clipping each corner at an angle, and glue
the margin, tucking in the corners as you go.
- To finish the portfolio, fold it in half like a book.
- Measure the pocket area on the manufactured folder, and allow the
same amount on the new one. Draw a guideline on the cardboard indicating the
fold line.
- Scoring paper or cardboard makes it easier to fold. Open the
scissors, so you can use one blade like a knife. Lay the ruler on the line, and
draw the blade across the cardboard, staying on the line.
- Fold up the bottom and crease, making the pockets. Unfold and lay
flat.
- On each side, measure an allowance of about .50" and draw a line.
Score and fold the material over. Remove the extra cardboard from each bottom
corner in the margin.
- Fold up the pockets, and glue the .50" area down to keep the
pockets in place. Use white glue for this step.
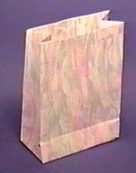
Design a Gift Bag:
- These simple gift containers are very environmentally-friendly,
because they're made by recycling materials, and they can be reused.
- To make one, lay the gift bag pattern on the back side of a piece
of wallpaper.
- Trace the shape, and cut it out.
- Notice where the manufacturer scored or folded the bag, and use a
ruler and pencil to measure and mark the fold lines.
- Score each line with the scissors.
- Stand up the manufactured bag, and fold it back into its original
shape, so you can study all the folds.
- Copying the manufacturer's folding method, pop up the wallpaper
into a new bag.
- Use white glue to fasten the side seams and to glue the bottom.
- If you wish to attach handles, punch holes and thread with a
matching cord. Knot each end to keep it in place.
Tips and Tricks:
- If you don't have a paper cutter, use a t-square or a triangle to
keep corners square.
- Patterns for paper products will last longer if you make a set
from sturdy cardboard.
- Collect other mass-produced paper products and cardboard items
such as tea bag boxes to use as templates for future projects.
- It's possible to handcraft almost any paper product that one sees
in shops or department stores. Try making gift boxes, calendars, note pad
holders, and pencil containers. Carefully study the items to see how they're
constructed before taking them apart.
Visit the Annenberg/CPB exhibit on
garbage to learn more about the solid waste problem and how you can do your
part to help solve it.
© 1998 Marilyn J. Brackney (update 2018)
Volume 13 No. 2
 Return to Departments
Previous
Activities
Select this to choose other activities.

![]()
![]()